Showing posts with label Low Carb. Show all posts

Wednesday, August 29, 2012

Broiled Tamari Ginger Salmon Steaks

I love going to the store and check out to see what looks fresh and delicious. I'm a big stickler on eating seafood that looks and smells fresh. I like to cook any seafood I bring home that day. While strolling along the seafood section at Whole Foods, I noticed no only is the salmon on sale, but it is a bright ruby red. Perfect. I knew exactly what was for dinner tonight! I made a simple marinade once I got home and let the salmon absorb the flavor for about a half hour. After marinating in the fridge, I place the salmon steaks on a well oiled cookie sheet and let them broil for a bit. A simple dish with simple flavors - but stellar turn out. I purchase the salmon in steak form, as they are much more appealing visually - at least to me. The parts that are charred looking were actually the tastiest (and fattiest). Tons of good fats in salmon (high in Omega 3's) and vitamin D. So don't be shy about enjoying the fatty crunch pieces, they are good for you. I split the piece in half and saved half of it for tomorrow's lunch. Planning on having a mixed greens salad with ginger dressing and the salmon right on top - YUM!

Be aware - salmon steaks usually have some bones in them, so be careful when you are eating. My salmon steaks we slightly less than an inch thick and cooked for 7 minutes. They turned out perfectly - not dry at all!  I left the skin on the outside of the steaks, which is optional. Also - Always try to buy wild-caught salmon, as it is the safest to eat (low mercury).  


Broiled Tamari Ginger Salmon Steaks

Cook Time: <10 minutes
Prep Time: < 35 minutes
Serves: 4 (5oz portions)

Ingredients:
  • 2 tbsp Tamari
  • 1 tbsp honey
  • 1 tsp freshly grated ginger
  • pepper to taste
  • 20oz of wild caught salmon steaks (approx 2 pieces)
  • 1 tsp of oil (for the pan)


In a shallow bowl mix the Tamari, honey, ginger and pepper. Place the steaks in the marinade and cover. Place in the fridge for 30 minutes or so. 


Once the salmon has marinated - Preheat the broiler and prep a lined cookie sheet with some foil. Grease the foil well with the oil. 


Place the salmon on the grease cookie sheet and broil for about 7-10 minutes, depending on the thickness of the steak. 


Once the salmon is completely cooked, allow the salmon to rest a few minutes and then serve.  


Nutritional Info per 5oz portion:
Calories: 290 ; Fat: 13g ; Carbohydrate: 3g ; Fiber: 0g ; Sugar: 2g ; Protein: 37g 


Friday, August 17, 2012

Light Goat Cheese and Mushroom Frittata

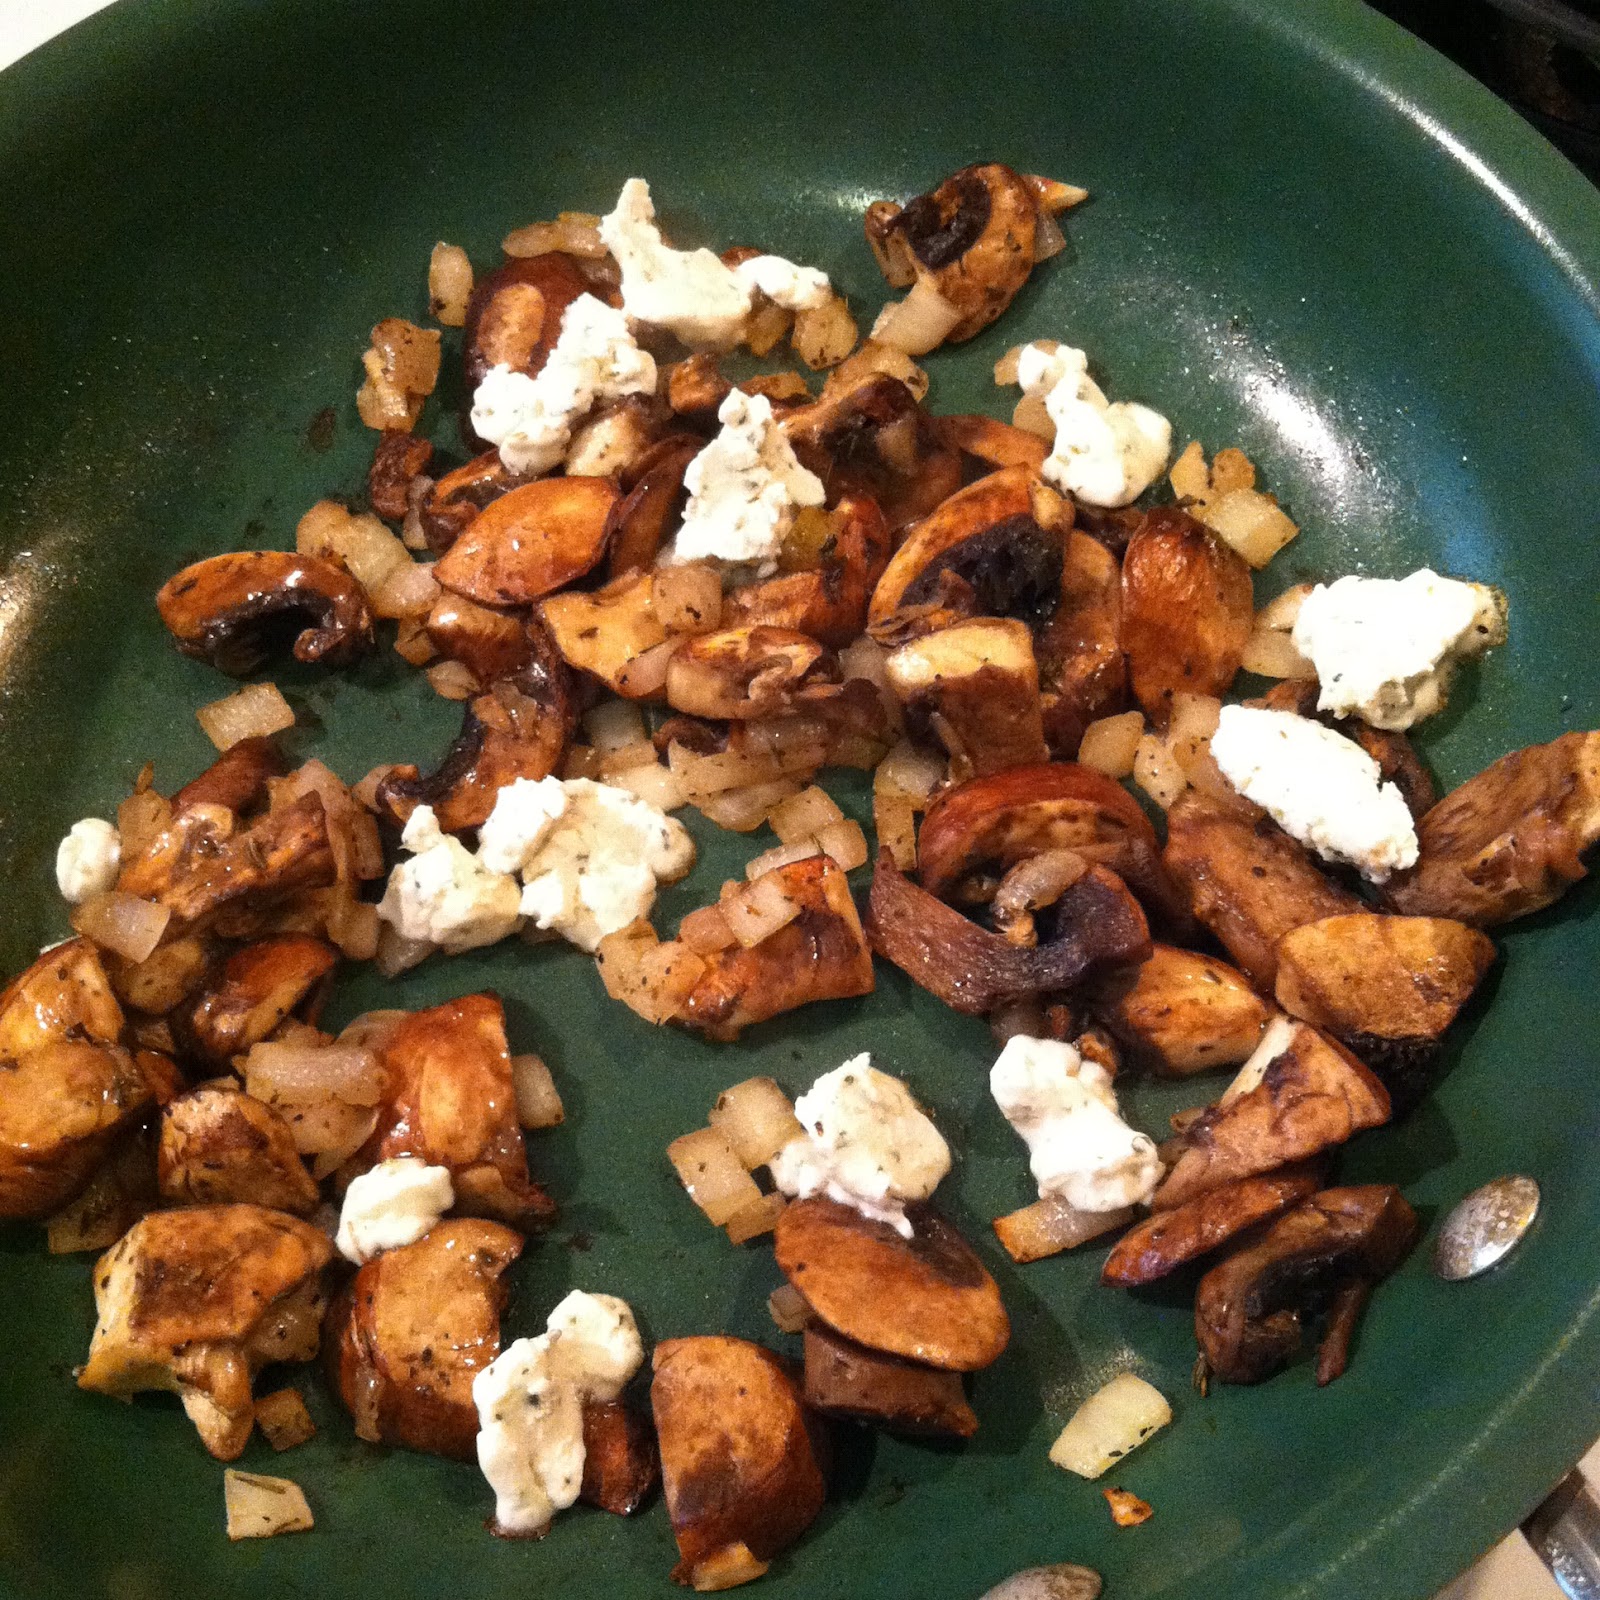
I really enjoy starting my day with eggs. My usually egg dish consists of 2 eggs over medium and a slice of toast with mashed avocado on top. Always delicious and never fails, but I wanted to change things up a bit this morning. Since I'm trying to lose my excess baby weight, I opted to use egg whites and a couple whole eggs, rather than all whole eggs. This helps keep the frittata figure friendly and still gives the frittata substance. Don't get me wrong, I could eat an all egg white frittata, but since I'm nursing I need to be getting adequate amounts of fat - which in this case comes from the yolks of the organic cage free eggs. Yolks are not bad! They contain the majority of the vitamins, minerals and much needed fats - especially if you purchase quality eggs. What the chicken eats and how it is raised can effect the nutritional quality of the egg. So not only is it more humane to purchase cage free eggs, but it is a bigger nutritional punch too! I like to make sure whatever I eat is benefiting my body in some way, and having a yolk or 2 is a great way to make sure I'm getting my Omega fats in early in the morning. 

This recipe was made to feed my husband and I, but you could easily double it to feed your family. If you don't like goat cheese, then use a cheese you enjoy or omit it completely for a dairy-free version. I personally love warmed goat cheese on anything (even a leather shoe). I make this a super quick breakfast by having some pre-chopped onions and mushrooms on hand, so all I have to do is sprinkle into the pan and cook. All I did was reserve some of the diced onion and mushroom left from the previous nights' meal. Makes for a fuss-free breakfast, not having to chop anything.  


Light Goat Cheese and Mushroom Frittata

Cook Time: <10 minutes
Prep Time: <5 minutes
Serves: 2

Ingredients:

  • olive oil spray
  • 1/4 of a large onion, diced
  • 1/2 tsp of dried Italian seasoning
  • salt and pepper, to taste
  • 4oz baby bella mushrooms, diced
  • 1oz herb goat cheese
  • 3 organic cage free egg whites, scrambled
  • 2 organic cage free whole eggs, scrambled
Heat a medium-sized oven safe skillet over medium heat. Spray with a little olive oil spray and begin cooking the onions.

Saute for about 3 minutes, then add the sat, pepper, Italian seasoning and mushrooms. Cook for another 3 minutes, or until the mushrooms have cooked down a bit.


While that is cooking, in a small bowl beat the egg whites and whole eggs together (if you'd like, add a bit of salt and pepper as well) until slightly frothy. 


Add the goat cheese and the beaten eggs to the pan. Swirl the pan a bit to make sure it is completely coated with the egg mixture. Allow it to cook for about a minute on the stove and then transfer the pan to the oven. Broil on low for about 2-4 minutes. It should be slightly golden on top and should be firm throughout.


Cut into wedges and serve hot. 

Nutritional Info per Serving:
Calories: 145 ; Fat: 8g ; Carbohydrate: 3.5g ; Fiber: 1g ; Sugar: 1g ; Protein: 15.5g

Thursday, August 2, 2012

Beefy Kale and Mushroom Ragu

Serving a simple Ragù can warm any belly. What's great about this recipe is that you can serve it as is or you can use it to top pasta, fresh greens, crusty bread, or rice. I decided to use it over gnocchi since that's what I was craving at the time. This Ragù isn't very saucy, it's mostly meat and veg. If you prefer to have a more saucy sauce, just add an additional 1/2 cup or cup of tomato sauce. I made my own sauce by simply combining fresh herbs to plain tomato sauce. It's tastes so much better when there is fresh basil in it :) . 


I used a fresh gnocchi that was sold at my local store, took about 4 minutes to cook. Very easy stuff. If you don't want to make your own tomato sauce, then use whatever type of prepared tomato sauce you enjoy.  


Beefy Kale and Mushroom Ragù 

Cook Time: < 25 minutes
Prep Time: < 10 minutes
Serves: 4 


Ingredients:
  • 2 cups organic tomato sauce
  • 2 tbsp fresh basil, minced
  • 1 tbsp fresh parsley, minced
  • 1/2 tsp fresh oregano, minced
  • 1 tsp olive oil
  • 1/2 large onion, diced
  • 2 cloves of garlic, minced
  • Salt and Pepper, to taste
  • 4-5 large Kale leaves, stems removed and chopped into bite-sized pieces
  • 6oz cremini mushrooms, cleans and sliced 
  • 3/4 lb lean ground grass-fed beef
Optional:
  • 1- 17.5oz package of gnocchi
  • freshly grated Parmigiano Reggiano
  • fresh minced parsley


In a small pot, heat the tomato sauce, basil, parley and oregano over medium-low heat. Salt and pepper to taste. Stirring occasionally. Allow the sauce to simmer for about 10-15 minutes. Taste and adjust seasonings as needed. 


In a large skillet, heat the oil over medium heat. Add the onion and saute for 3 minutes, then add the garlic. Saute for another 3 minutes, or until the onions are soft and the garlic is fragrant. Salt and pepper, to taste (lightly)


Add the chopped kale and mushrooms into the pan. Mix well into the onion mixture. The kale leaves will gradually decrease in size. Cook for about 4 minutes or so. Remove the mixture from the pan and set aside. 


In the same large skillet, add the ground beef, still at medium heat. Crumble and brown until completely cooked through (5-8minutes). Salt and pepper, to taste if you'd like. Drain the excess fat. 


Add the kale mixture to the ground beef and toss well. Pour the tomato sauce over and allow the mixture to cook for 5 minutes. Taste and check seasoning. Adjust if necessary. 


Serve the Ragù piping hot. Enjoy it over whatever you'd like or as it. 


Nutritional Info for 1/4 recipe (not including optional ingredients): 
Calories: 220 ; Fat: 7g ; Carbohydrates: 19g ; Fiber: 5g ; Sugar: 5g ; Protein: 22g


Monday, July 23, 2012

Baked Italian Zucchini Boats

I wanted to thank all of the guest bloggers from the past week for the awesome posts!! If you missed any of them - check my archive section from Week 7/15-7/22. Different recipes and topics such as Date Balls, Open Faced Baked Stuffed Peppers, Tips for Staying Motivated and Chardonnay Steamed Mussels. I'm starting to settle back in at home with the new babe and enjoying being a new parent. I definitely underestimated how time consuming a newborn can be! I've been eating up all of my freezer meals (that I prepped beforehand) and meals made by family members the past 2 weeks. I'm glad to start cooking again, but I'm not sure how much time I'll have to writing up the posts, taking pictures, etc. I'll try to post something new every couple days and hopefully over time get back to posting daily. Ok enough talk.... on to the recipe...


I got a bunch of great looking zucchinis at the farmers market and was looking to make a simple side to go with the main dish I had made. Since I had some ricotta and some jarred pasta sauce in the fridge just hanging out, I decided to put them to use. I wasn't sure whether to cut up the zucchini into slices and toss it with the tomato sauce and ricotta or make a stuffing out of it. It looks much prettier as a zucchini boat :) . Super simple to make and took practically no time to prep. I could totally eat these as a first course or as a side to any meal - they are just so tasty!!


I used Newman's Own Organic Tomato and Basil Pasta Sauce as the sauce (my favorite go-to sauce). Any pasta sauce you enjoy will work in this dish. I chose to not cook the zucchini too much, because I like my veggies to have a bite to them. Baking the boat helps dry them out some - since zucchini can be quite wet. By omitting the bread crumbs this dish is gluten-free and low carb. Happy eating!


Baked Italian Zucchini Boats

Cook Time: 25 minutes @ 400F
Prep Time: < 5 minutes
Serves: 2


Ingredients:
  • 1 large zucchini, split in half horizontally (2 pieces)
  • 2 tbsp part skim ricotta cheese, divided
  • 2 tbsp jarred organic pasta sauce, divided
  • 1 tbsp whole wheat breadcrumbs, divided
  • 1 tbsp fresh grated Parmigiano Reggiano, divided
  • fresh parsley, minced
  • salt and pepper, to taste


Preheat the oven to 400F and get a cookie sheet out to place the boats on.


Take the zucchini halves and scoop out the center some with a spoon. Just enough to make a "boat".


Spread 1 tbsp of ricotta and 1 tbsp of tomato sauce on each half.


Sprinkle the parsley, 1/2 tbsp of breadcrumbs and Parm on top of the tomato sauce.


Salt and pepper to taste and lightly spray with a little oil over the breadcrumb topping.


Bake at 400F for 25 minutes, or until the zucchini is slightly soft. Serve warmed


Nutritional Info per serving:
Calories: 100 ; Fat: 3g ; Carbohydrate: 12.5g ; Fiber: 2.5 ; Sugar: 4g ; Protein: 5.5g 

Saturday, July 21, 2012

Guest Post - Ellen's Asparagus Soup

Hello everyone, I'm Ellen from Ellenbcookery .   I'm so pleased to be guest posting again here at Laurie's cravings and happy you're back today.  Laurie and I would like to show you what was done with the leftover asparagus stems we didn't use in yesterday's stuffed pepper recipe .  Since the previous recipe only calls for the asparagus tips, I also made an asparagus soup with the remaining sticks.  It's really tasty and uses simple ingredients.  We hope you enjoy!


- EllenB 
Ingredients:

  • 1 large organic onion, diced
  • approx. 3-4 cups of water (add more if you'd like)
  • 1 organic vegetable bouillon
  • salt and pepper to taste
  • 4 organic potatoes, quartered
  • leftover asparagus spears
  • splash of cream (optional)

Instructions:  


Saute the organic onion in a large pot until well cooked. 


Add water to pot,  an organic vegetable bouillon, salt & pepper.  


Once bouillon dissolves, add 4 quartered organic potatoes and cut up asparagus sticks.  


Once potatoes are cooked, puree with hand blender.  


Tasty on it's own, or you could add a splash of cream.

Friday, July 20, 2012

Guest Blogger - Ellen B's Baked Open Faced Pepper Surprise

I'm so pleased to be guest posting on Laurie's Cravings.  I'm more than thrilled to help Laurie while she takes this time to bond and get into a routine with her newborn son, Jared.

This stuffed pepper recipe is one that I found in a Belgian TV guide like magazine while I was living in Belgium.  It was so similar to something my mother-in-law used to make.  I hope you enjoy.  This recipe only requires asparagus tips.  Please come back tomorrow and we'll show you what I did with the remainder.


Cook Time: 30 minutes @ 350F

Ingredients:
  • About 4 bell peppers
  • 4 finely sliced small zucchini
  • 1 diced large tomato
  • 1 small diced onion
  • 3 diced garlic cloves
  • olive oil
  • salt and pepper, to taste
  • asparagus tips
  • crumbled feta cheese


Thank you tons to Ellen B for such an awesome post - check out her site (Ellen B Cookery)

Wednesday, June 27, 2012

NY Strip w/ Sassy Onions

I'll admit, I'm not much of a meat eater - but being pregnant sure does make you crave things your wouldn't normally eat. So steak for dinner it is! I prefer to make my own steak, as opposed to going to a steak house. I find that the meat is usually over seasoned, over priced and who knows where it came from. The key to making a great steak at home is getting the best quality of meat available (and a good sear on the outside). If it's great meat, it should be able to stand alone without fancy sauces, seasonings and excessive oil. Sure it's nice to have some seasoning, but not to excess - like most places prepare steaks. These "Sassy Onions" are a nice compliment to the NY Strip. It's like PB & J - steak and onions are meant to be together. NY Strip is a fairly lean cut of meat, so try not to over cook it. That is one reason why I love NY Strips - not super fatty but protein loaded. 


I purchased grass-fed NY Strips from Fresh Market (which happened to be on sale, my favorite!). Buying good cuts of meat on sale, and freezing them, makes eating high quality foods affordable. I purchased a decent amount to freeze for future use, since I don't normally see grass-fed NY Strips on sale. I'm a firm believer in buying in bulk, it saves you money and time later down the road. Just make sure you wrap the meat well, so it doesn't get freezer burn. 


My Dairy-Free friends - if you don't want to add the butter to the onions, that's fine, but it gives them a nice gloss and good flavor. I would recommend substituting it with a non-dairy butter, like coconut butter. 


NY Strip w/ Sassy Onions


Cook Time: < 25 minutes
Prep Time: < 5 minutes
Serves: 4 


Ingredients:

  • 1 tsp olive oil
  • 1 large sweet onion, sliced into 1/4 inch slices
  • 3 cloves of garlic, minced
  • 1/2 tsp dry mustard
  • 1 tsp Worcestershire sauce
  • 1 tsp organic butter
  • salt and pepper, to taste
  • 1 lb of grass-fed NY Strip Steak, cut into 4 - 1 inch thick 

Heat the oil over medium heat in a large skillet.


Season the NY Strip with salt, pepper and 1/2 tsp of Worcestershire on both sides. Let the meat absorb the flavors while you cook the onions. 


Add the onion to the heated skillet and saute for about 5 minutes. Then add the garlic, dry mustard and 1/2 tsp of Worcestershire. Saute for another 5 minutes or until the onions are starting to slightly brown and are real soft. Add the butter to the pan, salt & pepper and coat the onions well. Remove the onions from the pan, and set aside. 


Add the seasoned NY Strip to the skillet and let it cook for about 4 minutes on one side or until a nice brown crust has formed. Flip and cook for 4 minutes on the other side. 


Add the onions on top of the steaks and cover the pan. Reduce the heat to low and allow the meat to cook to desired done-ness (about 4 more minutes to medium or longer for a more well done steak).


Serve the steaks with the onions on top.

Nutritional Info per Serving (4oz meat and 1/4c onions):
Calories: 200 ; Fat: 8g ; Carbohydrate: 5g ; Fiber: 1g ; Sugar: 0g ; Protein: 25g

Wednesday, June 20, 2012

Earthy Spinach and Mushroom Chicken

The mushrooms in this dish really shine. There is such an earthy flavor going on. It is hearty enough for any appetite - full of veggies, lean protein and very little oil used. Excellent meal to serve any weeknight. It comes together quickly and uses only 1 pot. Also most of the ingredients are pantry staples, so no need to make an extra trip to the store. 


I used baby bellas, as they stand up well during the cooking process. I didn't discard the stems though. I cut up the stems and used them in this recipe. It helps make the flavor earthy and full. I really like using chicken thighs, as they tend to stay moist and have a bit more flavor than chicken breast. This meal can be easily halved or doubled, depending on how many mouths you need to feed. It is great for leftovers or next day lunch. The flavors really come together the second time around. 


I opted to toss the spinach, mushroom and chicken mixture with freshly cooked pasta, but it is completely optional. By omitting the pasta, this is a wonderful Primal, Low-Carb or Gluten-Free meal. Same goes for the cheese that I used as a garnish - completely optional. By omitting the cheese, this is a dairy-free. 


Earthy Spinach and Mushroom Chicken


Cook Time: < 30 minutes
Prep Time: < 10 minutes
Serves: 4 


Ingredients:

  • 1 tsp olive oil
  • 2 large onions, diced
  • 3 cloves of garlic
  • 1 lb of organic boneless skinless chicken thighs
  • salt and pepper to taste
  • 2 tsp of Herbs de Provence 
  • 2 tbsp organic tomato paste
  • 8oz baby bella mushrooms, cleaned and sliced (use stems)
  • 1/2 cup frozen organic chopped spinach
  • 1/4 cup dry red wine (I used Shiraz) or chicken stock

Optional:

  • 8oz of dry spaghetti (cook according to directions on container)
  • freshly grated Parmigiano Reggiano 
  • fresh parsley, minced 

Heat the oil in a large pot over medium heat. 


Optional: Heat another large pot with salted water - for the pasta. Cook the pasta according to directions


Add the diced onions to the oil and saute for about 5 minutes. Then add the garlic and saute for 3 minutes. Make sure to stir every so often.


Add the chicken thighs, salt & pepper, Herbs de Provence. Let the chicken thighs brown on 1 side for about 5 minutes, then turn. Cook for another 5 minutes. 


Add the tomato paste, mushrooms and spinach. Stir in well. Cook for about 5 minutes. 


Add the red wine and cook for another 5 minutes, allowing the alcohol to cook out. 


Serve as is, or as I chose to - tossed with spaghetti, Parm and parsley.


Nutritional Info per Serving (not including optional toppings/pasta):
Calories: 215 ; Fat: 6g ; Carbohydrates: 12g ; Fiber: 3g ; Sugar: 2g ; Protein: 26g

Monday, June 18, 2012

Spicy Thai Beef Red Curry

Almost every time my husband and I go out for Thai food, I order curry. I can't get enough of it! So I decided to try to make it at home. This is my 2nd attempt at making it (the first time around it was too mild and a bit watery). This time it came out perfectly - savory, spicy, and balanced. It was so easy to make, you just have to stock your pantry with the right ingredients. I am going to continue to experiment with cooking thai curries - this is going to be awesome!!


Most Thai Curries are made with full fat coconut milk (which is absolutely delicious), but I like to reduce the amount of fat I eat when cooking at home. I substituted the regular coconut milk for the light coconut milk. It makes the sauce a bit thinner but you'll hardly notice the difference. I also didn't use much oil in the process, making it lighter. 


 Spicy Thai Beef Red Curry


Cook Time: 30 minutes
Prep Time: < 10 minutes
Serves: 4-6 


Ingredients:

  • 1 tsp oil
  • 1/2 large onion, diced
  • 1 organic carrot, peeled and diced
  • 1 organic bell pepper, sliced into thin strips
  • 1/2 tsp of fresh ginger, grated
  • 1/2 lb of grass-fed sirloin, thinly sliced
  • 1 can of bamboo shoots, drained and rinsed well
  • salt and pepper, to taste
  • 2 cans of organic light coconut milk
  • 3-4 tbsp of red curry paste (depending on how spicy you like it)
  • 1 tbsp brown sugar, packed
  • 2 1/2 tbsp fish oil
  • fresh cilantro (optional), minced

In a large pot, heat the oil over medium heat.


Add the onion, carrot and pepper. Saute for about 4 minutes. Add the ginger and saute for 3 more minutes. Transfer the onion mixture to a plate, and set aside.


In the same pot, add the sirloin strips (season with a little salt and pepper). Cook for about 4 minutes, or until all pieces are cooked through. Remove from the pot and set aside. 


Now add the rest of the ingredients (except the cilantro) and stir well. Make sure to break up the red curry paste well. Allow the coconut milk to come almost to a boil. Add the veggies and the meat back into the pot. 


Cover the pot, reduce the heat to low. Let it simmer for about 15-20 minutes. 


Serve the beef curry over fresh jasmine rice. Garnish with a little cilantro.

Recipe adapted from Thai Kitchen

Saturday, June 16, 2012

Easy Chicken Stock

Making chicken stock is fool-proof. Dump a bunch of ingredients in a pot and let it simmer for hours, while you take care of other important things. Instead of throwing away the chicken carcass/bones, it gets used for flavoring a bunch of future dishes. Everyone has carrots, celery and onion on hand - so this is a pantry cleaner. You can also save the shavings from carrots, leaves from celery and other odds and ends as part of flavoring this stock. Re-purposed food!


If you want to removed any excess fat, once the chicken stock has cooled, place in the refrigerator for about a day. The next day, any fat should float to the surface. Just use a slotted spoon to scoop the fat solids. 


Storing the stock in the fridge in glass jars makes for an easy flavor enhancer to simple dishes such as rice or soups. Use it as you would water, but reduce the amount of salt you may use in the dish. You can also freeze the stock and use it as needed. You can store it in freezer safe containers or an ice cube tray (for instant portion control). I like to freeze at least 1 ice cube tray with stock. It makes for a quick flavor boost to any entree. 


Easy Chicken Stock


Cook Time: at least 4 hours
Prep Time: < 5 minutes
Serves: Makes about 8 cups of stock


Ingredients:
  • 8 cups of cold water
  • 1 chicken carcass
  • 2 large carrots, cut into large chunks
  • 3 stalks of celery, cut into large chunks
  • 1 large onion, quartered
  • 2 garlic cloves, smashed
  • 5 sprigs of fresh thyme
  • 3 fresh bay leaves
  • 1 tsp of dried coriander seeds
  • 1 tsp of sea salt
  • 1/2 tsp of pepper
  • extra salt and pepper, to taste
In a large stock pot, add all of the ingredients over low heat. Cover and let simmer for at least 4 hours. Stir on occasion. 


Once the stock is done - using a colander, drain the stock from the pot into a large glass jar or bowl. Allow the stock to cool. Keep in the fridge for up to a week or freeze for use later. 

Sunday, May 6, 2012

Spicy Shrimp Pasta

Went to Whole Foods today and decided to grab some shrimp for dinner tonight. I haven't had shrimp in awhile and wasn't sure what I was going to do with it until I got home. I just grabbed a few things from the fridge and pantry and this dish was born. Quick and easy - my kind of meal. It is basically my version of Aglio e olio - pasta with garlic, olive oil and red pepper flakes.

This dish is pretty spicy and super garlicky. If you need to reduce the spice or garlic, that is absolutely fine. Also if you prefer to skip the pasta then this can be eaten with a good crusty bread, over rice or as is. Great low-carb main dish if you forgo the pasta. I topped it with cheese, but completely optional.


Spicy Shrimp Pasta


Cook Time: <15 minutes
Prep Time: < 10 minutes
Serves: 4


Ingredients:
  • 10oz fettuccine 
  • 2 tbsp olive oil
  • 5 cloves of garlic, minced
  • 1 tsp of crushed red pepper flakes
  • 1 1/2lbs of fresh jumbo shrimp, peeled and de-veined 
  • salt and pepper to taste
  • juice of 1 lime 
  • 3 tbsp of cilantro, minced
  • freshly grated Parmigiano Reggiano (optional)


Cook pasta according to directions on the package in a large pot.


Heat oil in a large skillet over medium high heat. 


Add garlic and red pepper flakes and cook for a minute. 


Now add the shrimp and toss with the garlic mixture. Cook for about 5 minutes or until the shrimp is pink. 


Squeeze the lime over the shrimp and stir in the cilantro. Pour the shrimp mixture on top of the pasta and toss well. Serve and top with fresh Parmigiano.


Nutritional Info for 1/4 of the recipe (not including optional ingredients):
Calories: 450 ; Fat: 10g ; Carbohydrate: 55g ; Fiber: 2.5g ; Sugar: 1g ; Protein: 36g 

Saturday, May 5, 2012

Chicken Fajitas

It's Cinco De Mayo!!! And of course I'm celebrating with a simple, one pot meal that satisfies the belly. I wasn't 100% sure what to call this, but fajitas came to mind, so I'm going with it. When it comes to Mexican food, I find a lot of people use pre-packaged taco seasoning packets to flavor their meals. Well in this recipe you don't have to. The combination of the spices used here are pretty much what come in those packet, minus the chemicals, preservatives, excessive salt and added sugars. These are pretty basic spices that most people have in their pantry, so there is no need to spend the extra money on a seasoning packet. Also you can control how much spice, salt, and smokiness you prefer. 

I am a lover of anything spicy, so I included hot sauce in this recipe but if you aren't a fan, just omit it. Same goes for topping the fajita, if you dairy-free, then using cheese alternatives or no cheese as at all is perfectly fine. If you are on a gluten-free diet, then instead of the flour tortilla, try corn tortilla. Clean Eaters and the like - just omit the tortilla and enjoy the fajita mixture. This dish is flavorful enough to be eaten without toppings. Also I love being able to customize a dish to my liking (extra lime please!). A majority of this fajita mixture is veggies, so if you are trying to be a sneaky chef, this is your recipe! 


Chicken Fajitas
Cook Time: < 30 mins
Prep Time: < 10 mins
Serves: 4


Ingredients:
  • 1 tsp of canola oil
  • 1 small onion, diced
  • 1 green or red pepper, diced
  • 1 clove of garlic, minced
  • salt and pepper to taste
  • 1/2 tbsp of cumin
  • 1/2 tbsp of chili powder
  • 1 tsp of dried oregano
  • 1/2 tbsp hot sauce (optional)
  • 1 14.5oz can of organic diced tomatoes (drain some of the liquid)
  • 1 lb of boneless, skinless chicken breast, diced into bite size pieces
  • 1 lime
  • 3 Tbsp of fresh cilantro, minced (optional)
  • 1/2 cup shredded organic Mexican blend cheese (optional)
  • 8-10 flour or corn tortillas (taco-sized) (optional)


Heat the oil in a large skillet to med-high heat. Add the onions, peppers and garlic and saute for about 5 minutes until softened. Add the spices and in corporate well. Now add the tomato and the chicken, stir in well. Cover and reduce the heat to low. Let this simmer for about 10 minutes. 


Now remove the lid and bring the heat up to med-high. Let cook until most of the liquid has been absorbed and the chicken is cook thoroughly (about 10 minutes). Right before serving, squeeze the 1/2 lime over the top of the chicken mixture. 


Optional: Serve in a warmed flour or corn tortilla, sprinkle about 1 tbsp of cheese and top with fresh cilantro. Feel free to incorporate your favorite toppings as well. I reserve the other half lime to anyone who may want to add more lime to theirs. This recipe makes about 2 fajitas per person. 


Nutritional Info for 1/4 of the chicken mixture(not including optional ingredients):
Calories: 165 ; Fat: 2g ; Carbohydrate: 8g ; Fiber: 2g ; Sugar: 3g ; Protein: 27g 

Friday, May 4, 2012

Guacamole

I've been looking forward to having guacamole for 3 days now! I've just been waiting for my avocados to ripen. Luckily I had them in a brown paper bag to make sure they ripened quick. I was turned on to guacamole when I used to live in San Diego. I had seen it before, but never really understood what the big fuss was about. That was until I tried freshly made guacamole. Not that pre-made gooey stuff you find in the deli section at the grocery store. Nice and chunky with a little spice. Since then, I make guacamole whenever the craving hits or I've got a couple extra avocados on hand. 

Super easy recipe, requires no cooking and can last 3 days in the fridge (if it lasts that long). Can be served with practically anything. Chips, cut up veggies, or as a topping on most dishes. I'm going to be eating mine with some flax crackers. Enjoy!


Guacamole


Cook Time: 0 mins
Prep Time: < 10 mins
Serves: Makes about 2 cups


Ingredients:
  • 2 large ripe avocados 
  • 1/3 cup minced red onion (about 1/2 an onion)
  • 3 Tbsp minced fresh cilantro
  • 1 jalapeno, minced (with or without seeds)
  • 1 garlic clove, minced
  • 1 tsp of cumin
  • juice of 1 small lime
  • salt and pepper to taste
  • cayenne pepper to taste (optional)


Mash the avocado to desired consistency. Add the rest of the ingredients, combine well. Taste the mixture and add salt and pepper to taste. 


Serve immediately or place in the refrigerator, covered (to prevent browning). 


Nutritional Info per 2 Tbsp of Guacamole (if it makes 2 cups):
Calories: 80 ; Fat: 7g ; Carbohydrate: 6g ; Fiber: 3.5g ; Sugar: 1g : Protein: 1g

Monday, April 30, 2012

Roasted Lemon Rosemary Chicken

Roasted Chicken is a simple meal to make and very versatile. If you want to change the herbs or omit the lemon, you can. It will still turn out delicious. I chose to use lemon and rosemary because that is what sounded good. But you can use sage, thyme, herbs de Provence, or just plan salt and pepper. Also what is great is that after you've eaten your meal, the chicken bones can be used to make homemade chicken stock. Buying the whole chicken is usually less expensive than buying the chicken already cut up into sections and it can accommodate the dark and the white meal eaters in your family. 

I used Petaluma's Rocky Whole Chicken. It is free range, contains no antibiotics, fed a vegetarian diet and is humanely treated. If you are Clean Eating, remove the skin and focus on eating mostly white meat. 


Roasted Lemon Rosemary Chicken

Cook Time: 2 hours @ 350 degrees
Prep Time: 5 mins
Serves: 4

Ingredients:
  • 4 lb Free Range Whole Chicken (remove innards and giblets, if it contains it)
  • Juice from 1/2 an organic lemon
  • 2 sprigs of fresh rosemary (minced)
  • Salt and Pepper to taste
  • 1/4 cup organic low sodium chicken stock

Preheat oven to 350. Place the chicken in a roasting pan or an oven proof dish. 

Squeeze the 1/2 lemon over the top of the chicken. Sprinkle the rosemary, salt and pepper onto the chicken and rub into skin well (make sure to do this all over the chicken). Pour about 1/4 cup of chicken stock into the bottom of the pan (it help keep the chicken from drying out). 

Then place the pan into the oven and let it cook for about 2 hours or until the internal temperature reads 165 degrees.  If you have a larger or smaller chicken adjust the time by 15-20 minutes per pound.

Once you remove it from the oven, let the chicken rest for about 5-10 mins before carving. 

Nutritional Info per Serving (including skin):
Calories: 330 ; Fat: 17g ; Carbohydrate: 1g ; Fiber: 0g ; Sugar: 0g ; Protein: 40g

Nutritional Info Per Serving (without skin):
Calories: 215 ; Fat: 4g ; Carbohydrate: 1g ; Fiber: 0g ; Sugar: 0g ; Protein: 36g