Showing posts with label Vegetarian. Show all posts

Tuesday, September 25, 2012

Cheesy Jalapeno Cornbread

Cornbread is so easy to make - especially if you purchase a box of cornbread mix. I try to always have a box on hand, to make meals easy during the week. You just add in whatever flavors you'd like and within minutes you've got a savory or sweet bread. I've made a variety of cornbread - blueberry, extra cheesy, smoky, and of course super spicy. This is my version of a southwestern cornbread. Slightly spicy and a bit cheesy. I like having some texture, so the corn kernels are great to have. I love serving cornbread with something wet, like chili or gravy. I will slice a piece, and toast it a bit (so it is nice a crunchy on the outside) and then crumble it on top. Or I'll just lightly butter it and scarf it down. I apologize in advance that there are no pictures of the cornbread sliced - it was eaten before I got a chance to take a picture. I guess it means it was good :)

I've made this cornbread with unsweetened almond milk and it turns out just fine. Also I do recommend using the sugar, it really helps bring out the sweetness in the corn. It's subtle, but sure makes a huge difference! I used Jiffy cornbread mix, but any brand will do. I've tried many varieties and they are all good. I just make sure to purchase the ones that are plain (with no added flavorings).


Cheesy Jalapeno Cornbread

Cook Time: 15-20 minutes
Prep Time: < 5 minutes
Serves: 9  

Ingredients:

  • oil spray
  • Box of cornbread mix
  • 1/3 cup skim milk
  • 1 egg
  • 1/2 cup grated sharp cheddar cheese
  • 1/2 jalapeno, minced w/ seeds (optional)
  • 1/2 cup frozen white corn kernels
  • 1 tbsp sugar
  • pinch of pepper

Preheat the oven to 400F. Prep a 9 x 9 pan with oil spray and set aside.

In a large bowl, combine the rest of the ingredients. Mix until it had all come together. 


Pour the mixture into the greased pan and place in the oven for 15-20 minutes


Once the corn bread is golden brown and completely cooked, allow it to cool for about 5 minutes before cutting and serving.


Nutritional Info per Square:
Calories: 135 ; Fat: 4.5g; Carbohydrate: 21g ; Fiber: 1g ; Sugar: 6g ; Protein: 3.5g

Wednesday, September 19, 2012

No Bake Nutella Kamut Crispie Treats

I used to make rice crispies all the time when I was younger. It was easy to make and tasted so much better fresh than the packaged versions. Plus I felt like such a big girl, making my own desserts and snacks. This is an updated version of those treats. I've experimented with peanut butter, almond butter and now I'm making it even better with some nutella. Who doesn't love nutella?! Sweet, hazel-nutty deliciousness. These are a great no-bake dessert or snack. It takes less than 10 minutes to make, which is awesome, since I don't have a ton of time with the new baby, to be whipping up something sweet. I am definitely a chocoholic, and having something on hand to satisfy that craving is always a good thing. It keeps me from reaching for the not-so-desirable candy bars and similar treats. These are quite rich, so I recommend eating as more of a dessert than a mid afternoon snack. 

I used puffed Kamut,  but you could use any puffed unsweetened cereal. I just happened to have Kamut on hand. 


No Bake Nutella Kamut Crispie Treats

Cook Time: < 10 minutes
Prep Time: 20 miniutes
Serves: 9 bars

Ingredients:

  • 1oz hazelnuts, toasted and chopped
  • 1 1/2 tbsp salted butter
  • 3/4 cup nutella, divided
  • 1/2 cup mini marshmallows
  • 1 tsp pure vanilla extract
  • 1/4 tsp ground cinnamon
  • 3 cups organic kamut puffs


In a small skillet, toast the hazelnuts in a dry pan for about 5 minutes over medium heat. Shake the pan every so often and set the toasted hazelnuts aside. Once cooled, chop the nuts.


In a large pot, over low heat, combine the butter, 3/4 cup of the nutella, marshmallows, vanilla and cinnamon until melted through.


Stir in the kamut puffs, until well coated with the nutella mixture.


In a 9 x 9 pan (or whatever size you'd like), even spread the kamut/nutella mixture into the pan. Press down well, compacting it into the pan.

Sprinkle the chopped nuts evenly over the crispies, and press down slightly.


In the microwave, heat the leftover 1/4 cup of nutella for about 15 seconds or until slightly melted. Drizzle the melted nutella over the top of the crispies.


Place the pan into the refrigerator for about 20 minutes, to allow the chocolate to set.


Cut into 9 pieces and enjoy!

Nutritional Info per Bar:
Calories: 190 ; Fat: 10.5g ; Carbohydrate: 21g ; Fiber: 1.5g ; Sugar: 16g ; Protein: 3g


Monday, August 27, 2012

Skinny Vegetarian Black Bean Tostada

Tostadas are usually very high fat and not exactly something you want to be eating if you are trying to lose the extra baby weight (Me!). I love the open-faced factor - It's like a mini Mexican pizza. Instead of frying the tortilla, I just warm it through. I used corn tortilla because they are much thicker and hold up better. I didn't want the liquid from the beans and eggs to break it down. I made these as a quick week night meal, but these would be perfect for breakfast as well. Since these are basically a just assemble-and-serve meal, you can customize it to fit your family's likes and dislikes. Topping ideas: shredded cheese, salsa, sour cream, hot sauce, lime juice, tortilla chips, fresh diced red onion, etc. Customize it how ever you'd like. I really like the avocado and tomato only. The heat from the egg softens the avocado, making it buttery and delicious. My husband added cheese, salsa and tortilla chips to his. With the yolk being slightly runny, I punctured the egg and let the yolk run all over the top of the tostada. OOOHH it's so good. 

The corn tortilla I got were green chile flavored - which was awesome. They were really tasty and 90 calories each. I purchased them at the Fresh Market, I'm not sure if they are available in other stores. It was the first time I had seen them. If you prefer to scramble the eggs, that would be good too. I've made these same tostada a million times, in a million different ways, and scrambled eggs are awesome. 


Sorry for the foggy/poor lighting photos, these were taken while tropical storm Isaac was hitting South Florida.


Skinny Vegetarian Black Bean Tostada

Cook Time: < 25 minutes
Prep Time: < 10 minutes
Serves: 8 tostadas

Ingredients:

Black Beans:

  • 1 tsp oil
  • 1/2 large onion, diced
  • 1/2 bell pepper, diced
  • 2 cloves of garlic, minced
  • 1 tbsp red wine vinegar
  • 1 tsp dried oregano
  • salt and pepper, to taste
  • jalapeno flavored hot sauce, to taste (optional)
  • 1 tbsp tomato paste
  • 2 cups cooked black beans (or canned beans, drained and rinsed)

Tostada:

  • 1 medium tomato, diced
  • 1 haas avocado, diced
  • 8 corn tortillas, warmed
  • oil spray
  • 8 cage-free eggs, fried 
  • fresh cilantro, minced

Heat the oil in a medium pot, over medium heat. Saute the onions, peppers and garlic for about 5 minutes.


Add the vinegar, oregano, salt, pepper, hot sauce, tomato paste and black beans to the pot. Stir well, reduce heat and cover. Allow the beans to simmer for about 10 minutes or longer. 


While the beans are simmering, prep the tostada ingredients. Begin frying the eggs (in the oil spray) and cooking to your desired done-ness. (I did mine medium, I like to poke the yolk and let it run into the beans and veg). Salt and pepper the egg if you'd like. 

Warm the tortilla in microwave or on the stove top. If you are using the microwave, about 10 seconds per tortilla. On the stove, just heat the tortilla on a dry skillet until they are warm and loose.


To assemble the tostadas - Place the corn tortilla on a plate, top with 1/3 cup of black bean mixture, 1/8 of the diced tomatos and avocado (add a bit of salt and pepper if you'd like) and top with the fried egg. Sprinkle with a little cilantro. 


Serve piping hot and have a few toppings on hand for customizing.


Nutritional Info per Tostada:
Calories: 270 ; Fat: 9.5g ; Carbohydrate: 29g ; Fiber: 7g ; Sugar: 1g ; Protein: 16g

Thursday, August 23, 2012

Skinny and Speedy Cuban Moros (Rice and Beans)

Moros is a typical Cuban side dish of rice and beans cooked together. Usually it is cooked with pork belly chunks and can take awhile to cook. This is a lighter, vegetarian version that is cooked up in less than 20 minutes. I love eating Moros with any meal, but most versions that are available at restaurants are so greasy and heavy, it makes it hard to really enjoy. I've taken matters into my own hands and made this lovely side dish figure-friendly and easy enough to serve any night of the week. Not only is this a complete protein (yeah Veggies!) but it is a great side dish for any meal. 

If you decide to eat this as a main dish, this will serve 2. I usually will end up eating this as a main meal or lunch because it's really filling and really hits the rice/beans craving right on the nose. If you decide to make a larger batch, you'll have to adjust the cook time. Next day lunch anyone? 


Skinny and Speedy Cuban Moros

Cook Time: < 20 minutes
Prep Time: < 5 minutes
Serves: 4

Ingredients:

  • 1 cup cooked black beans (or canned - rinsed and drained)
  • 1 cup dry white rice
  • 1 clove of garlic, minced or smashed 
  • 1 dried bay leaf
  • 1/2 tsp of ground cumin
  • 1/2 tsp smoked paprika
  • 1/2 tsp onion powder
  • 1 tsp red wine vinegar
  • 1 tsp oil
  • 2 cup vegetable stock
  • salt and pepper to taste
Garnishes:
  • fresh cilantro, minced
  • fresh lime juice

In a rice cooker - place all of the ingredients in and stir well. Turn on and let cook until done. 

Remove the bay leaf (and garlic if smashed) and serve hot.


On the stoveHeat a medium/large pot over high heat. Add all of the ingredients in and stir well.


Allow it to come to a boil, then cover the pot and reduce the heat to low. Let the rice cook for about 10-15 minutes, or until the liquid is absorbed.


Remove the bay leaf (and garlic if smashed) and serve hot. 

Nutritional Info for 1/4 of the recipe:
Calories: 180 ; Fat: 1.5g ; Carbohydrate: 32.5g ; Fiber: 4g ; Sugar: 0g ; Protein: 6g 

Friday, August 17, 2012

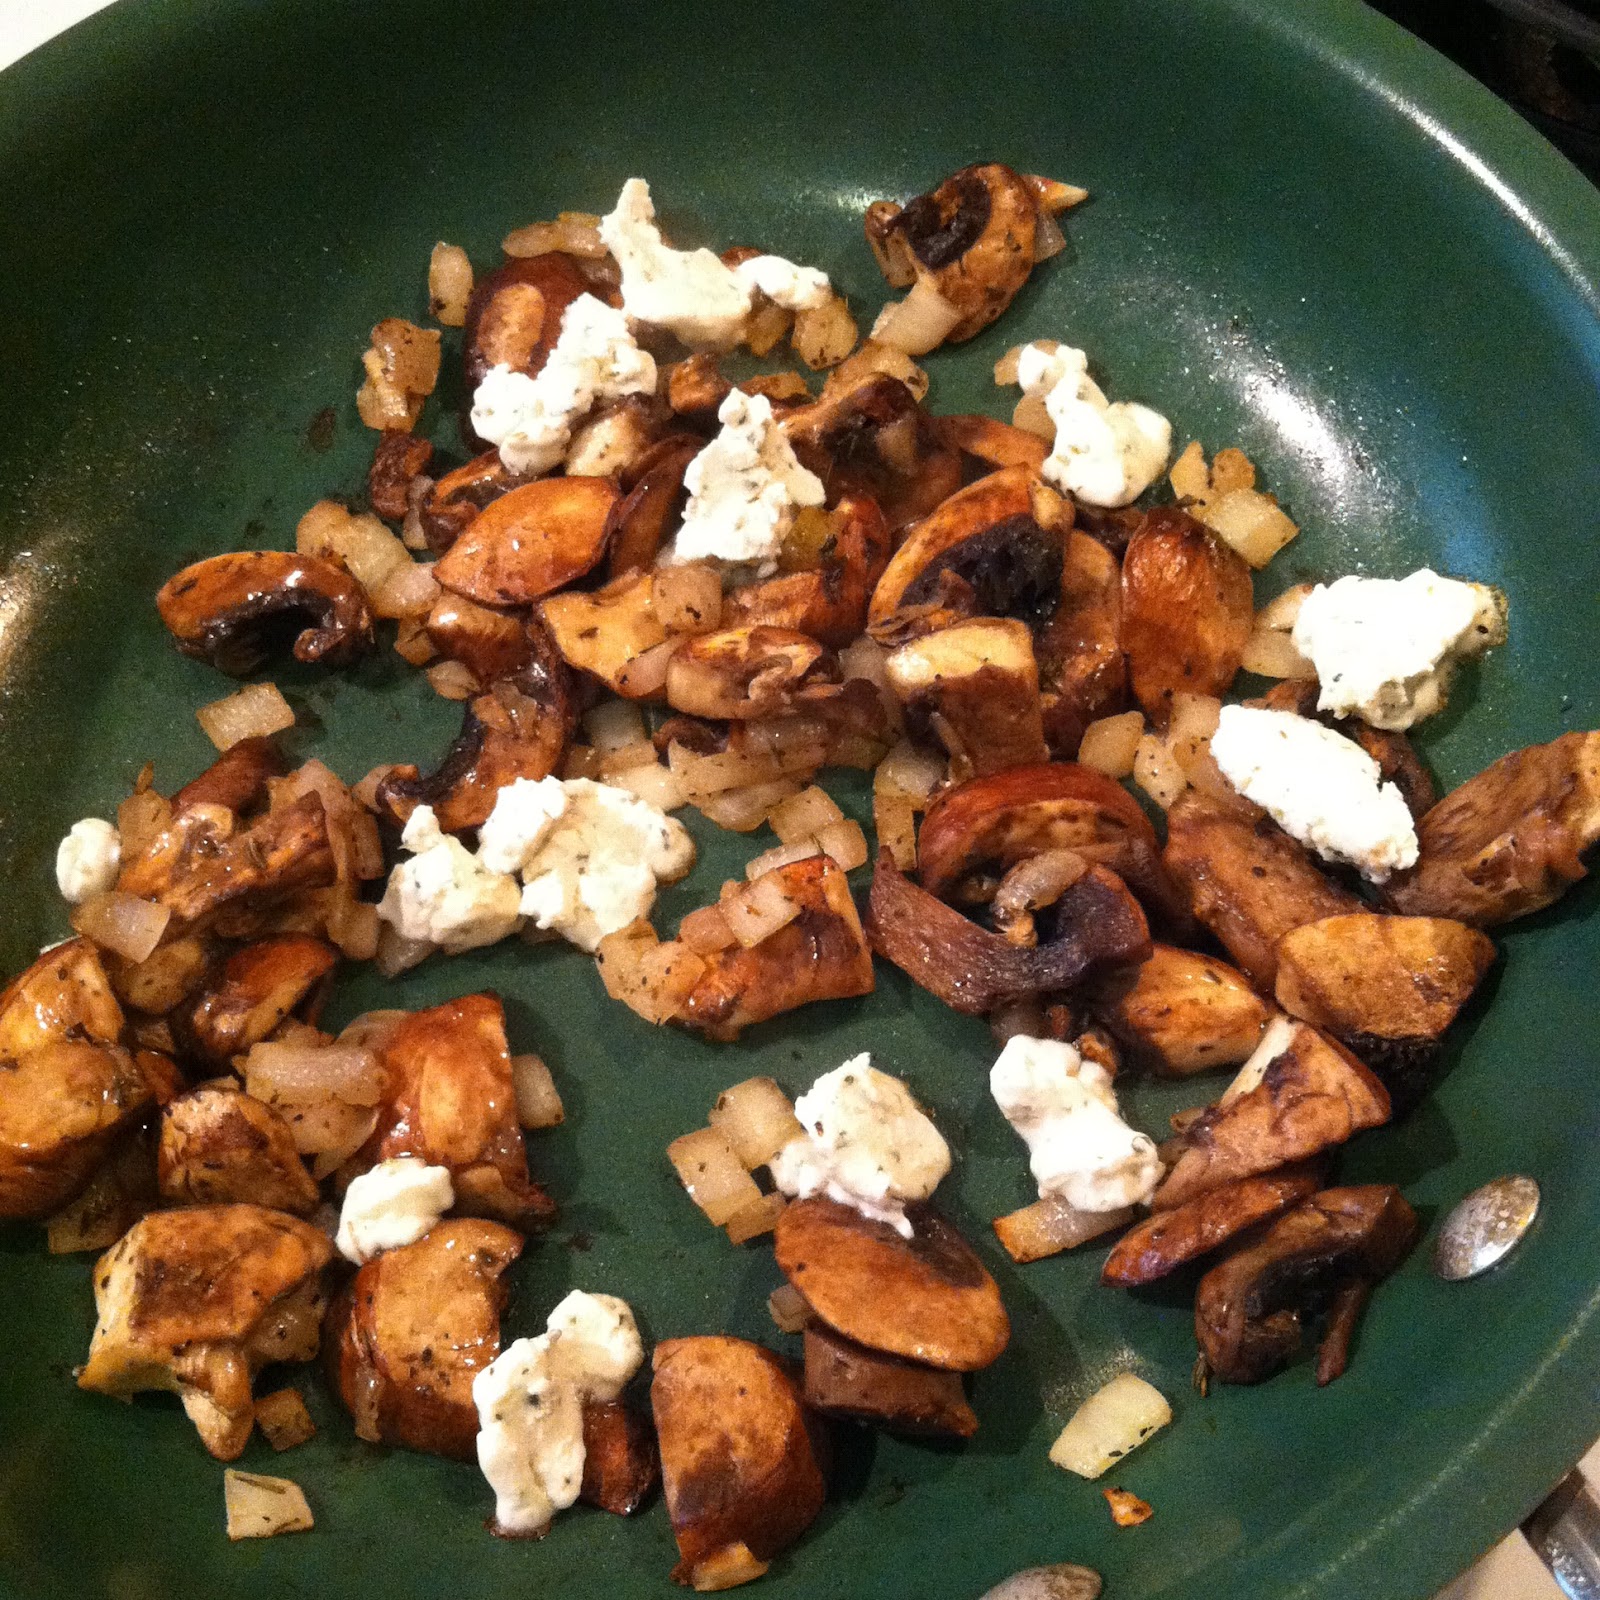
Light Goat Cheese and Mushroom Frittata

I really enjoy starting my day with eggs. My usually egg dish consists of 2 eggs over medium and a slice of toast with mashed avocado on top. Always delicious and never fails, but I wanted to change things up a bit this morning. Since I'm trying to lose my excess baby weight, I opted to use egg whites and a couple whole eggs, rather than all whole eggs. This helps keep the frittata figure friendly and still gives the frittata substance. Don't get me wrong, I could eat an all egg white frittata, but since I'm nursing I need to be getting adequate amounts of fat - which in this case comes from the yolks of the organic cage free eggs. Yolks are not bad! They contain the majority of the vitamins, minerals and much needed fats - especially if you purchase quality eggs. What the chicken eats and how it is raised can effect the nutritional quality of the egg. So not only is it more humane to purchase cage free eggs, but it is a bigger nutritional punch too! I like to make sure whatever I eat is benefiting my body in some way, and having a yolk or 2 is a great way to make sure I'm getting my Omega fats in early in the morning. 

This recipe was made to feed my husband and I, but you could easily double it to feed your family. If you don't like goat cheese, then use a cheese you enjoy or omit it completely for a dairy-free version. I personally love warmed goat cheese on anything (even a leather shoe). I make this a super quick breakfast by having some pre-chopped onions and mushrooms on hand, so all I have to do is sprinkle into the pan and cook. All I did was reserve some of the diced onion and mushroom left from the previous nights' meal. Makes for a fuss-free breakfast, not having to chop anything.  


Light Goat Cheese and Mushroom Frittata

Cook Time: <10 minutes
Prep Time: <5 minutes
Serves: 2

Ingredients:

  • olive oil spray
  • 1/4 of a large onion, diced
  • 1/2 tsp of dried Italian seasoning
  • salt and pepper, to taste
  • 4oz baby bella mushrooms, diced
  • 1oz herb goat cheese
  • 3 organic cage free egg whites, scrambled
  • 2 organic cage free whole eggs, scrambled
Heat a medium-sized oven safe skillet over medium heat. Spray with a little olive oil spray and begin cooking the onions.

Saute for about 3 minutes, then add the sat, pepper, Italian seasoning and mushrooms. Cook for another 3 minutes, or until the mushrooms have cooked down a bit.


While that is cooking, in a small bowl beat the egg whites and whole eggs together (if you'd like, add a bit of salt and pepper as well) until slightly frothy. 


Add the goat cheese and the beaten eggs to the pan. Swirl the pan a bit to make sure it is completely coated with the egg mixture. Allow it to cook for about a minute on the stove and then transfer the pan to the oven. Broil on low for about 2-4 minutes. It should be slightly golden on top and should be firm throughout.


Cut into wedges and serve hot. 

Nutritional Info per Serving:
Calories: 145 ; Fat: 8g ; Carbohydrate: 3.5g ; Fiber: 1g ; Sugar: 1g ; Protein: 15.5g

Wednesday, August 15, 2012

Vegan Chocolate and Banana Oat Bars

I like to make my own snacks, since buying pre-wrapped snacks can really be pricey and contain too many unnecessary ingredients. These Oat Bars are dairy-free, egg-free, gluten-free, vegan-friendly and are nut-free. Wow! So practically anyone can eat these! Made from very basic ingredients, these bars are easy to make and tasty to eat. You can customize them to your liking by adding toasted nuts, a tsp of flavoring, dried fruit (instead of chocolate) and spices. By making your own snack bars, you are saving not only money but you are getting exactly what you are craving in your bar. I'm a huge chocoholic - which is why these have plenty of mini chips, so I can get some in every bite. I didn't have to add any sugar to these because the bananas and chocolate chips have enough sweetness to make these perfect. 

The mini semi-sweet chocolate chips I used are by Enjoy Life. They are dairy-free chips that melt wonderfully. If you are concerned about gluten, make sure you purchase oat that are for sure not processed in a facility that may contain gluten. Although oats are gluten-free, they can sometimes be contaminated.  These can be stored in the fridge, wrapped tightly for about a week. You could freeze them as well - just make sure to wrap each one individually. 


Vegan Chocolate and Banana Oat Bars

Cook Time: 30 minutes
Prep Time: < 5 minutes
Serves: 9 squares

Ingredients:

  • 1/2 tsp coconut oil
  • 2 large ripe bananas, mashed
  • 3oz mini semi-sweet chocolate chips
  • 1/2 tsp fine sea salt
  • 1 tsp pure vanilla extract
  • 1 cup unsweetened almond milk
  • 1 1/2 cup organic rolled oats 
  • 2 tbsp organic ground flaxseed

Preheat oven to 350F. Grease a 9 x 9 baking pan with a little coconut oil. Set aside

In a medium sized bowl, mash the bananas until practically a puree. 


Add the rest of the ingredients and mix well. 


Pour the mixture into the greased baking pan and bake at 350F for about 30-35 minutes, or until the oat bars are set. 


Allow the oat bars to cool before cutting into 9 pieces. 


Serve them at room temp or warmed.


Nutritional Info per bar:
Calories: 140 ; Fat: 5.5g ; Carbohydrate: 31g ; Fiber: 5g ; Sugar: 8g ; Protein: 2.5g 

Monday, August 13, 2012

Whipped Skinny Potatoes

Who doesn't love whipped potatoes?! Whipped potatoes were a staple in my house growing up. My mom would boil the potatoes, then add a stick of butter, about a cup of milk and salt/pepper. Very easy recipe but very fattening. Potatoes are not to be feared or avoided. I'm a big stickler in having everything in moderation - especially my favorite comfort foods. Potatoes are often seen as a fattening food or not diet friendly, but in reality it's what you put on/in them or how they are cooked, as to what changes their nutritional value. Potatoes are rich in nutrients, just like all other veggies. Sure they are a starchy vegetable, but they still provide valuable vitamins and minerals. I recommend eating them as a side item, rather than a meal. I find that combining a small portion of starchy foods with protein and fat, helps my body metabolize it better. Eating a predominantly starchy meal leaves me feeling sluggish (known as the"Itis"). So eat your potatoes in moderation and enjoy them guilt-free!

I found over the years I really like my potatoes to have a tang to them. Sometimes I add sour cream, but I really like using Greek yogurt instead. It's super thick and tangy, which is perfect for whipped potatoes. I used about 1 cup of milk for the amount of potatoes cooked. I like pretty thick whipped potatoes, but if you prefer a thinner version, just add a bit more milk.

I used KerryGold's Garlic and Herb Butter in this recipe - this is one of my favorite butters!! It is super flavor packed and from grass-fed cows. Most grocery stores now carry it, so check it out, it's truly an awesome butter to have on hand.


Whipped Skinny Potatoes

Cook Time: < 30 minutes
Prep Time: < 10 minutes
Serves: 6

Ingredients:

  • 2.5lbs of russet potatoes, peeled and halved
  • 2 tbsp herbed butter 
  • 2/3 cup 0% plain Greek yogurt
  • salt and pepper, to taste
  • 2-3 tbsp fresh parsley, minced
  • 1 cup organic skim milk (approx)

Fill a large stock pot with water and a bit of salt. Place the peeled and halved potatoes inside. Bring to a boil and allow the potatoes to cook until fork tender. 


Drain the potatoes well and transfer the potatoes back to the stock pot. Add the rest of the ingredients except the milk (gradually pour the milk into the potatoes as you are whipping them). 


Using a hand blender (or whatever device you'd like), whip the potatoes on low and begin pouring in the milk in 1/3 cup increments. Depending on how wet you'd like you potatoes, add more or less milk. Also make sure to taste the potatoes to check for any adjustments in seasoning. Try not to over whip, it will make them gummy. 

Serve the whipped potatoes piping hot, along side whatever main dish you have prepared.

Nutritional Info per Serving (approx. 2/3 cup):
Calories: 210 ; Fat: 3.5g ; Carbohydrate: 38g ; Fiber: 2.5g ; Sugar: 4g ; Protein: 8g

Thursday, August 9, 2012

Dark Chocolate and Cherry Banana Bread

I was browsing on Pinterest and found this wonderful recipe. It originally has raspberries but I didn't have any on hand - I had sweet delicious cherries.  I am so impressed with how it turned out!! The cherries are perfect in this bread -they really stand out. It is definitely a dessert bread - but I'm sure with some more tinkering, I can make it even better. Maybe add some ground flaxseed and remove the sugar completely. I already reduced the sugar to 1/2 a cup but I think next time I'm going to see how it is with just the sweetness of the fruit and chocolate. I also used whole wheat pastry flour, rather than all purpose flour. A bit more fiber and nutrients than the white stuff. Hands down - this is my favorite combo for a sweet bread. The bits of dark chocolate throughout the bread are amazing. If you choose to eat the bread warmed, the chocolate is slightly melted and heavenly. Trying this recipe gives me inspiration to start baking more, and I'm sure my husband won't be complaining. We thoroughly enjoyed our slices with some french pressed coffee after dinner - my husband had some vanilla bean ice cream with his. 

I used a stand mixer to combine everything together, but I'm sure a hand mixer will work just fine. Just make sure to combine the ingredients well in each step. I did let it cook for 55 minutes and found that the top browned too much, so next time I'm going to aim for 50 minutes and see how that does. I topped the bread batter with the leftover shavings of the dark chocolate, which gave it a nice look and taste.


Dark Chocolate and Cherry Banana Bread

Cook Time: 50-55 minutes
Prep Time: <15 minutes
Serves: 10

Ingredients:

  • 1 tsp coconut oil
  • 2 c whole wheat pastry flour
  • 3/4 tsp baking soda
  • 1/2 tsp fine sea salt
  • 1/2 cup raw sugar
  • 4 tbsp organic unsalted butter, room temp
  • 2 eggs
  • 3 very ripe bananas, mashed
  • 1/3 cup non-fat plain greek yogurt
  • 1 tsp pure vanilla extract
  • 1.5oz 60% dark chocolate, chopped
  • 8oz rainer cherry, pitted and chopped (toss with 1 tbsp whole wheat pastry flour)


Preheat the oven to 350F and grease a loaf pan with alittle coconut oil. Set aside.

In a small bowl, combine the flour, baking soda and salt. Set aside.

In a large bowl, beat the sugar and butter together until well combined. Gradually add each egg, beating well. 

Then mix in the bananas, yogurt and vanilla. Beat the mixture well. 


Gradually mix in the flour mixture until it is combined. Then add the chocolate, mixing in lightly.


By hand, fold the cherries into the batter. 


Once the batter is well mixed, pour into the grease loaf pan and bake in the oven at 350F for 50-55 minutes. Check to see if it is baked completely by inserting a toothpick into the center. It should come out clean. 


Let the loaf pan cool for about 15 minutes before trying to remove the bread. 


Slice into 10 pieces and enjoy warmed or at room temperature.


Recipe adapted from Recipe Boy

Nutritional Info per slice:
Calories: 265; Fat: 8.5g ; Carbohydrate: 42g ; Fiber: 5g ; Sugar: 18g ; Protein: 5.5

Sunday, July 29, 2012

Whole Wheat Lemon Ricotta Pancakes

My husband's favorite go-to brunch item is the Lemon Ricotta Pancakes from Cheesecake Factory. We will go there Sunday mornings just for those (or the Baja Hash, but that's a different story...). They are light, airy and simply delicious. I had never tried ricotta pancakes before those, and I think they are absolutely the best.  Instead of going out for these yummy pancakes, I decided to make them myself (since having a newborn can make things a bit difficult). The lemon has a very clean taste and the pancakes are slightly sweet. I used wheat flour, rather than the typical white flour to bump up some of the nutrition and fiber. I also used a light amount of oil, sweetener and light versions of dairy. This recipe makes 5 good sized pancakes. Adding a bit of fruit on top can help bulk up with meal a bit more. I adapted this recipe from one I found on Eating Well's website and I'm VERY pleased with the out come. My husband agreed, these are some of the best pancakes I've ever made. I can't wait to experiment more with other flavors. 

Using Whole Wheat Pastry Flour vs. Whole Wheat Flour is what makes this lighter than it would normally be. Also by sifting the flour, you are aerating it, allowing a more fluffy texture. If you prefer a sweeter pancake, I would bump up the honey to 1-2 tbsp. I highly recommend spreading out the batter when you place it on the hot pan. I smoothed mine out fairly thin, and found they were perfect in the middle (and it made the pancake look huge!).


Whole Wheat Lemon Ricotta Pancakes

Cook Time: < 20 minutes
Prep Time: < 5 minutes
Serves: 5 (1/3 cup) pancakes (approx. 6in diameter)

Ingredients:

Dry: (sifted)

  • 3/4 cup organic whole wheat pastry flour
  • 1 tsp baking powder
  • 1/4 tsp baking soda
  • 1/2 tsp organic nutmeg 
  • 1/8 tsp salt

Wet:

  • 3/4 cup part-skim ricotta cheese
  • 1 egg
  • 1 egg white
  • 1/2 cup skim milk
  • 1/2 tsp pure vanilla extract
  • 1 tsp honey 
  • zest of 1 lemon
  • 1 1/2 tbsp lemon juice 


  • 1 tsp organic coconut oil (divided - for the pan)

Optional:

  • powdered sugar
  • pure maple syrup


Preheat a large skillet over medium heat. 

In a small side bowl, sift the dry ingredients together. Set aside.


In a large bowl, whisk the wet ingredients together until well combined. (Do not use the coconut oil, it is for greasing the pan).

Gradually incorporate the dry ingredients into the wet, until combined. Try to not over mix. The batter will be a bit thick.


Take a 1/4 tsp of coconut oil and place it in the center of the hot skillet. Then place a 1/3 cup of the pancake batter over top and smooth out slightly. Allow the pancake to cook about 3-5 minutes. These pancakes don't really bubble on top like other recipes do, so just pay close attention to not overcook. 


Then flip the pancake and allow to cook a few more minutes, until cooked through. Repeat these steps until all of the batter is used.

Serve the pancakes warmed. Top with whatever you'd like or enjoy as is. 


Nutritional Info per Pancake:
Calories: 155 ; Fat: 5g ; Carbohydrate: 19g ; Fiber: 2.5g ; Sugar: 3g ; Protein: 8g 

This recipe is adapt from: Eating Well

Monday, July 23, 2012

Baked Italian Zucchini Boats

I wanted to thank all of the guest bloggers from the past week for the awesome posts!! If you missed any of them - check my archive section from Week 7/15-7/22. Different recipes and topics such as Date Balls, Open Faced Baked Stuffed Peppers, Tips for Staying Motivated and Chardonnay Steamed Mussels. I'm starting to settle back in at home with the new babe and enjoying being a new parent. I definitely underestimated how time consuming a newborn can be! I've been eating up all of my freezer meals (that I prepped beforehand) and meals made by family members the past 2 weeks. I'm glad to start cooking again, but I'm not sure how much time I'll have to writing up the posts, taking pictures, etc. I'll try to post something new every couple days and hopefully over time get back to posting daily. Ok enough talk.... on to the recipe...


I got a bunch of great looking zucchinis at the farmers market and was looking to make a simple side to go with the main dish I had made. Since I had some ricotta and some jarred pasta sauce in the fridge just hanging out, I decided to put them to use. I wasn't sure whether to cut up the zucchini into slices and toss it with the tomato sauce and ricotta or make a stuffing out of it. It looks much prettier as a zucchini boat :) . Super simple to make and took practically no time to prep. I could totally eat these as a first course or as a side to any meal - they are just so tasty!!


I used Newman's Own Organic Tomato and Basil Pasta Sauce as the sauce (my favorite go-to sauce). Any pasta sauce you enjoy will work in this dish. I chose to not cook the zucchini too much, because I like my veggies to have a bite to them. Baking the boat helps dry them out some - since zucchini can be quite wet. By omitting the bread crumbs this dish is gluten-free and low carb. Happy eating!


Baked Italian Zucchini Boats

Cook Time: 25 minutes @ 400F
Prep Time: < 5 minutes
Serves: 2


Ingredients:
  • 1 large zucchini, split in half horizontally (2 pieces)
  • 2 tbsp part skim ricotta cheese, divided
  • 2 tbsp jarred organic pasta sauce, divided
  • 1 tbsp whole wheat breadcrumbs, divided
  • 1 tbsp fresh grated Parmigiano Reggiano, divided
  • fresh parsley, minced
  • salt and pepper, to taste


Preheat the oven to 400F and get a cookie sheet out to place the boats on.


Take the zucchini halves and scoop out the center some with a spoon. Just enough to make a "boat".


Spread 1 tbsp of ricotta and 1 tbsp of tomato sauce on each half.


Sprinkle the parsley, 1/2 tbsp of breadcrumbs and Parm on top of the tomato sauce.


Salt and pepper to taste and lightly spray with a little oil over the breadcrumb topping.


Bake at 400F for 25 minutes, or until the zucchini is slightly soft. Serve warmed


Nutritional Info per serving:
Calories: 100 ; Fat: 3g ; Carbohydrate: 12.5g ; Fiber: 2.5 ; Sugar: 4g ; Protein: 5.5g